Monday, March 29, 2010

Baby Explosion

Mrs. D was the last of my close friends to get married over the past 3 years.  Yeah, I am the only one left . . . it's okay, cause I tell them, that my ring will be BIGGER than all of theirs.  LOL I have been honored to be maid of honor in all of their weddings and loved every minute of it! However, who am I supposed to choose!? It has been a question lurking in the back of my mind for a long time.  I guess, King and I will have to draw straws. . . . Any suggestions would greatly be appreciated.  Now that all of the friends are married, I know the baby explosion is going to start happening just like the weddings did.  Mrs. P is already pregnant!! Yay! I am so excited for her.  It is killing me that I do not know what the sex of the baby is!  I want to make some stuff!!!  Since I knew the baby explosion was coming I decided to do some practing and monogrammed on some baby burp rags for some of the girls in our H-town office that recently delivered.  One of the girls like them so much, that she actually placed an order for a gift! How lucky was that!?  She also ordered some bibs too!  The ones that I made aren't monogrammed; however, they turned out super cute!  Check 'em out! 
 This is really easy and inexpensive thing to do with minor sewing skills.


Burp Rags:
1) Purchase cloth diapers, I believe it was a package of 12 for about $9.
2) Purchase fabric, several fabrics with coordinating prints.  Honestly, I don't know how much you will need per rag.  I already had some existing fabric and had to buy more.  If you want to be really exact with the fabric and not over buy, take your cloth diaper into the store.  Pre-was fabric and cloth diapers.
3) Cut fabric one inch larger than the cloth diaper. If you want to add a band of fabric with trim to the bottom half of the diaper, go ahead and add that and sew on the trim.
4) Fold under edges of fabric and pin to cloth diaper.  It won't the 100% exact because the cloth diaper is not exactly square.
5) Sew fabric really close on the edge to cloth diaper and you are done.
6) Make in sets of three. I folded mine really nice with a cute tag.

Yeah I forgot to change the orientation of the picture.

Bibs:
1) Get pattern from this place and print out.  I used pattern Bib A and made my own directions (or you can follow theirs.)
2) Purchase fashion fabric, terry cloth and iron on stabilizer.  I did not buy terry cloth at the fabric store; I went to Dollar General and bought a large bath towel. for $2.  Pre wash your fabric and towel.
3) Cut one of fashion fabric, terry cloth and stabilizer.  Use pattern to add accenting fabric at the bottom.  Iron your stabilizer to the back of the fashion fabric, follower manufactures directions.  Sew on trim.
4) Sew fashion fabric to the terry cloth with the "right" side of the fashion fabric down.  Be sure to leave opening so you can turn the bib right side out.
5) Turn right side out, iron and top stitch around the edges.
6) Add a snap or velcro and your done.  Once again, I made a set of three and added a cute tag.

This is such a great and inexpensive gift to give to anyone.  Especially since the burp rags and bibs match, people just love that stuff.  It's a great way to use of some of your scraps too! I have a tendency to buy a lot of pink fabric, so I didn't have to buy that much more fabric.  Well I am a cheapy, so I have to point out the fact that the cloth diapers are $9 for 12, and you could probably get fabric for about $15, which is a total of $24, thus making each set only $8!! Also, my Mom told me she saw ONE diaper rage or $12 in Old Town Spring!!! Outrageous!! Hope you're able to make some for gifts!!


Note From The Autocrat: The post from yesterday was supposed to post on Friday, not sure what happened.  I don't think I saved it correctly from the night before, I thought I had the "scheduled" post set.  Need to work on that!

Sunday, March 28, 2010

DIY Home Decor

Since it is the day before Mrs. Drebeilbis's wedding I have decided to blog about her and some of her super crafty things that she has done recently.  Her and her fiance recently purchased a house and she has been going crazy decorating it.  Doing a good job too!! Especially since she has a lot of nice things on a budget!  However, I will never have the zebra rug that she has!!  I am sooooo jealous of it, even more jealous because her fiance actually harvested the zebra in Africa which makes it a little more special.  Can you believe that we live in Texas and it actually snowed around the same time that Mr. D wanted to propose?!  What a love story, I hope they live happily ever after! 

Mrs. D introduced me to a website called Shanty 2 Chic.  This website has a ton of great ideas.  It makes my blog look like chump change.  They don't post every single day, but when they do post, they post good stuff.  Here are some of the decorations that Mrs. D has done from Shanty 2 Chic.  If you are a crafter, you can usually look at the finished product picture and figure out what they did. If your are not a crafter you can follow along with their great step by step instructions that have a lot of pictures.
 These are my favorite! I can't wait to make some.  I like Shanty 2 Chic's idea, with the word " B-O-O"
I love this idea! I wish my walls where big enough to 
handle wall decor of this size.  They look really good in Mrs. D bedroom above the bed.  


Another great idea!!  A regular 'ol mirrow from Wal-Mart that was painted and then mounted to some old barn wood that was painted as well.  A wooded decal from a craft store add additional interest.  For only a few dollars she made a mirrow that would probably costs double at a place like Kirklands.


Friday, March 26, 2010

Don't Have A Cricut: GO BUY ONE!

It is late Thursday night and I have just finished up hemming my bridesmaid dress and a banner for Mrs. Drebeilbis's wedding.  A last minute detail that she never got around to; which does not surprise me because she did a million DIY things for her wedding.  It's a banner for her cookie decoration station (Will post picture after wedding).  Apparently, "stations" or "bars" are the hot item to have for a weddings.  For example, cookie bars, taco bars, candy bar, coffee bar, espresso bar, dessert bar, and of course, gotta have the traditional "beverage" bar with some adult drinks! Boy am I going to need some of those adult drinks this weekend! A busy week at work really takes a toll on the creative mind.

So I made the banner with the help of the Cricut cutter.  If you don't have one of these, you need to go get one! Even if you aren't a big time crafter, you will probably get alot of use out of it especially if you have kids.  They are great for birthday parties and projects for the kids.  Of course, the banners and cupcake toppers are my two number one items that I make for birthdays.  I highly suggest investing in one of these! Can you believe that cheap-o Autocrat Haley paid $300 for hers when they first came out over three years ago!!! I saw them for $75 last year on Black Friday, so you CAN get one!  Here are the cupcake toppers for one of my co worker's daughter's birthday.  Just gotta glue a toothpick to the back.  Okay so you don't want to purcahse a Cricut to make some cupcake toppers.  Another alternative to make square cupcake toppers that you make with a $10-$15 cutter from the craft store.  Make sure it has the tick marks for the measurements.  Okay, cut out a square that is 2.50 in x 2.50 in.  this will be the very back piece (the purple piece in the picture) Cut the second piece of paper 2.25 in x 2.25 in (the yellow piece in the picture) The last step is to cut out the white piece of paper that has your words on it.  That square will be 2 in x 2 in. Glue all together and hot glue the toothpick to the back.  You're done!  Oh yeah, I helped Mrs. Rooster and her daughter make super cute Valentines for her class, so another reason to tell your husband that you NEED one!

Wednesday, March 24, 2010

I Feel Like A Slacker

I have totally been neglecting my blog due to the fact that I have been sooooo busy at work.  And as most of you know, we do not have the internet at home (thus leaving me to do blogging at work).  Ahhh! I know we are just kinda cheap! However, we are high rollers now!  We officially have internet at home! Whoop! I am feeling like a slacker because I told myself if I was going to do this blog thing- I would try to blog almost everyday.  I am so behind. When I left off, I had a whole laundry list of things to do for the weekend. I was stoked cause they all got done! And if I do say so myself- the patio looks fabulous! As you can see for yourself in the pics.  

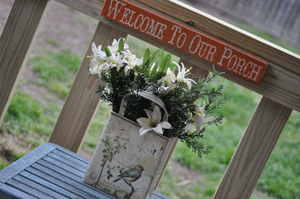
A light coat of spray paint on the existing table and a small arrangement with the sign that I purchased at the Fort Worth Stockyards make this seating area super snazzy!
(Can you believe that I actually purchased something that I could have made?)

 
 The two new chairs look great with the new throw pillow which ins't even shown in the picture LOL.
Sam's Club became a my new best friend for the weekend since the chairs where super cheap.
 King even put up the "garden" lights.
(You should've seen him! He was so pround of his work!)

I recovered the bench that was on the front patio but I didn't take an up close picture of it.  Go figure. All I need to do is stain the wood.  Apparently when you purchase new treated wood, you have to wait for it to "dry out" so I will probably tackle that task once the weather warms up and the rain stops.  I am totally going to beat up El Nino if he doesn't stop all this rain.  I will stain the wood and paint the house at the same time.  I know, your probably thinking- "She's going to paint her own house?!" Yep!  I sure am.  I just can't see hiring someone to do a job that I am perfectly capable of.  I know it is going to take me a little time, but I can get it done.  King is an expert caulker and will caulk anything that needs to be done before he goes out of town next.  Besides, I think I will go off on someone if they get paint on my brick, I just can NOT have that! 
Painted a bucket . . . for a cig buts.  Yeah . . . yeah. . . I know! 
Smoking is bad for you!
 Made the chair pad for the front porch rocking chair and put in a bushel of flowers from HL in the pot. For those of you who aren't good at making flower arrangements, just go to HL and buy the bushel of flowers that already have different flowers all in one.  Usually, it comes out cheaper compared to the individual stems.  Drop the whole bushel of flowers in a pot and BAM! it's done! (Don't forget to add floral foam in the bottom of your container.) I did this with the tiny arrangement for the back porch too!

Check out this very cute idea! Very "Spring-y" If you aren't really a crafter and want to be, make this Easter decoration and everyone will thing you are the next Martha Stewart!!  All you need are a few items, 1) square vase 2) two bags of jelly beans 3) one package of marshmellow candies such as Peeps 4) colored Easter grass 5) fake flowers.  I sorted my jelly beans because I onlywanted pink, yellow, and orange ones.  I think King ate the other colors.  Once you have all of your supplies, just layer the items, just like in my picture.  I have a layer of peeps on the front and a layer of peeps on the back; however, it is really hard to try to hide the floral stems in between the peeps and the grass; therefore, not making this arrangement a full 360 degree arragement.  Mine is placed on a table where you can't see the back due to the stems.  Hope you get inspired to maybe create one of your own floral arrangements!  Be sure to check out my old blog about my table arragements, they look super fabulous but didn't take a lot of time!

Wedding crunch time this week! Almost Mrs. Dreibelbis will no longer be "Almost" by the end of the week.

Monday, March 8, 2010

Manic Monday

lzdkfjgo;iasrgjulozdnbl/asdjgopjasdvl;nad;lgvn;xcm .ejkfopeajv  .  . . . .  . Is how I feel today!!! Oh my goodness!!! To busy to post the mamma jamma blog that I wanted to do.  The boss is out in the ocean this week on a cruise, thus leaving me super busy.  Also, the bachelorette party is this weekend and I need to go get supplies for it.  However, the whole "to-do" list got FINISHED! {Whoop!} 

Friday, March 5, 2010

Two Seasons: Winter and Summer

Wow, you just have to love the Texas weather! We only have two seasons: winter and summer.  There is no such a thing as a spring or fall season. . . . and if you live in Texas, you know exactly what I mean.  Now that summer is approaching oh so fast, I am scrambling to get all of my inside projects finished so I can start on outside projects.  And yes, outside projects do include mowing the lawn on a weekly basis because it takes me a little longer than King.  Most of the time he is out of town, so then it becomes my job. Why not hire a yard man? Cause I would rather use that "extra" money to get my hair did! LOL  Although, in some weird way, I think I like to mow the lawn. . . . . I guess it makes me feel good about myself and our little house.

Needless to say my "crafting to do list" is super long this for this weekend!! However, I did finally finish that 4th of July scrapbooking page that I was having a "creative block" on.  It's not the greatest, but it will do. Every time I scrap a 4th of July page it sucks and I don't know why.  I think it's because most 4th of July paper kinda stinks, cause my pics are usually good (or so I think so!)  While doing that page, I became fustrated, and started finishing up the laundry.  I was putting my clothes away and realized my closet looked like it threw up on its self! Everything was all mixed up and I felt the stress coming on! Yes, having an unorganized closet stresses me out.  All of the winter clothes where put back in their bins under the bed.  Ahhhh how clean it looked afterwards.  I would like to put in an order for the closet on the Sex In The City movie. 

Here's the to do list for the weekend:
1) Add decorative trim to bath towels
2) Cover the bench for back patio & purchase two new chairs and table.
3) Make cushion for rocking chair on front porch
4) Make flower pot arrangement for front porch
5) Power wash concrete on back patio and hang lights
6) Hem two pairs of jeans & sew button on shorts for King
7) Alter a dress
8) Cut out dress for soon to be  Mrs. D
9) Fertilize yard, if King hasn't already
10) Try to oil kitchen cabinents . . .  if there is time.
11) Oh yeah, King and I have a work related banquet to attend tonight.

Oh how I will be crazy busy!! But I like it that way.  Will have pictures for Monday.  Have a good weekend! I leave you with a picture of Curtis and I.  He makes me happy!!

Thursday, March 4, 2010

Creative Block

Where has the week gone?! I can't beleive today is already Thursday and I haven't even had a chance to blog all week.  Maybe it is because I am a cheap-o person and I don't have internet at home! Haha! No, for real, I'm not jokin'.  So whenever I do blog, it is usually after work or on my lunch hour.  I have come to the realization that if I want to blog then I am going to NEED to get internet at home. I am really wanting to make jazzy wallpaper and ect but that takes alot of time being on the internet.  Especially since all of this "HTML" stuff is so new to me.  I am having to read a lot of tutorials. 
This past week I have had a killer creative block!!  I have been working on the same scrapbooking page for over a week now. I just can't seem to get it right!! What is wrong with me!  I think it was the paper.  It's a 4th of July layout and there just aren't any cute 4th of July papers out there that aren't super juvenille looking.   I ended up taking my existing paper to the local scrapbook store to find something that would match a little better.  I must have about a million bo-gillion sheets of paper but I couldn't find any to match, go figure!  I got a few extra sheets so hopefully I will be able to get this page going on and finished.  Here are some pictures of the previous two pages that I did. My creative juices where totally happening when I was working on these.  Don't know what happened. . .  .
I am so proud of King! He has been working away at his "honey-do" list like you wouldn't beleive.  He even said "I'm not going to the gym until I get this done!" Whoa! Like where did that come from?! Cause if you know King, he loves the gym, and there aren't that many things more important than time at the gym.  King has been working on our patio this whole week.  Outside the back door there is a small slab of concrete. ..  and that's it.  It looks really dull, therefore, I am having King put up a railing around the concrete and a cover.  It is going to be fabulous!! I can't wait till it's finished!  Going to HL today to get some of those snazzy out door lights.
"Yeah Buddy!"

Monday, March 1, 2010

Birthday Weekend

King and I had an eventful weekend attending two birthday parties! One of course, one was at Mrs. Rooster's house with a bunch of nine year old girls.  Wow, that sure was an eye opener for King.  It kinda freaked him out! LOL  Since we don't have any children, he really doesn't know how to interact with kids, especially girls.  Thank goodness him and Mr. Rooster had a "free pass" to leave since it was an all girl party.  I would like to show off the super snazzy bulletin board that I jazzed up for Rooster Child.  It's just a regular 'ol bulletin board that you can basically find at any store, I got this one at Hobby Lobby, but I have seen them at Wal-Mart, Bed Bath & Beyond and at Target.  Purchase the bulletin board and a feather boa(s), then get out your staple gun to staple the boa to the edge of the bulletin board.  You're done! It only takes about five minutes and your able to give a super snazzy gift that any young girl would want.  Heck! I even made myself one for my craft room!!  Below is the other side of the cupcake toppers that I made. 
Related Posts with Thumbnails